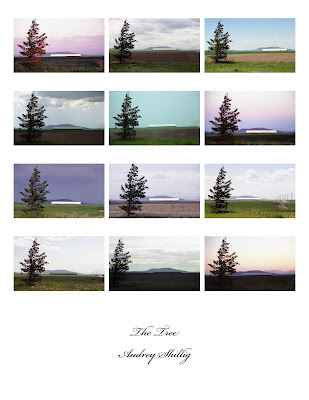
 I know I already showed you guys my Monet project, but I wanted to show you the finished project and tell you about a wonderful program called Photoshop.
 All of my pictures go through Photoshop before you guys see them. Mainly because I have to clean up all the dust spots that get scanned in there. The whole process is kind of long and tedious but let me educate you a little.
Step 1: Get filmed developed ( I get it developed at Wallgreens)
Step 2: Take my film to the photolab and put it in a special esal that is made for 35 mm film
Step 3: Preview the pictures using the scaner
Step 4: Choose the best ones to really scan
Step 5: Have the computer scan the specific negatives that I want and have it save it to my jump drive.
Step 6: Open up the images in photoshop and clean up all the dust spots that got scanned in (even though I cleaned the scanner and the film). This step probably takes the longest because sometimes these dust spots show up on peoples faces or other places that have a lot of detail. When I fix these I have to copy different parts of the picture so the consistency of the image stays intact.
Step 7 (optional): Adjust the color of the image so the color is more eye catching (I don't like to do this, just because it's not my style).
Step 8: Print on a 5x7, 8.5x11, 13x19, or a 17x22 sheet of luster paper.

Now I love this one. It looks so good all together. Good Job
ReplyDeleteBEAUTIFUL!!! I hope you frame this one & keep it forever. I wouldn't mind a copy to put in my home. :)
ReplyDelete